Monday, March 9, 2015

ONE YEAR!

That's right, we've been in the house for ONE WHOLE YEAR, as of yesterday, March 8. We've technically owned it for one year and a month, but that first month was busy with painting, kitchen demo, new fence and gutters, and other various preps. But we moved in on March 8, 2014, so we've officially lived here one year!
Having this blog is super helpful in reminding us of how much we've done.  I tend to get bogged down in lists of stuff I want to do, and all I see are things that need to be fixed/changed/upgraded, but holy crap, we've done so much!  And without the blog as an excuse, I wouldn't have ever really taken before, progress, and after photos, so this kind of milestone wouldn't be near as rewarding.
So!  Let's take a tour of the house, shall we?
First up: the kitchen:
Above is how the kitchen looked when we bought the house [and the pretty Wegner chair in the desk area was a housewarming gift from my parents], below is how it looked one week after moving in [because the bulk of the kitchen redo happened in the month between closing and moving]
And now: [one of my absolute favorite transformations in the whole house!]
Looking from the kitchen into the Magnitude room [named for the Community character, because we're dorks], one week in:
And now:
Here's another view of the magnitude room, from when we bought the house, nabbed from the intro post:
and today:
[I adore those vintage couches I scored last summer, but still haven't gotten around to covering the ugly back side...]
Here's a view of the built ins, in their beige-y pink state when be bought the house:
And today:
The view from the other side of the kitchen to the dining room, which when we bought the house was just a showcase of some of the most ....unfortunate... light fixtures in the house:
And now [SERIOUSLY improved by prettier lights]:
Living room fireplace one week in:
Now:
Living room one week in:
Now:


Super fun iPhone pano taken from the first time we saw the house, also nabbed from the intro post:
Copycat pano taken today:

[this corner view shows how much better the eaves look white as opposed to creamy yellow]
Dining room:
[another runner up for 'most improved' mainly due to light fixture awesomeness]
[Sadie likes to tuck in her feet when she lays down.  Because she's a weirdo.]

Down the hall to the hall bathroom, here it is one week in:
And today, a tiny bit less beige:
The plants then:
And now, sadly, they look a little unhappy....  When it warms up I'll replant them and attempt to make them perkier.  And look!  I hung some art on the back wall!
My office one week in:
And, sadly, today.  This is definitely the winner for 'worst attitude', which I will rectify in the near future.
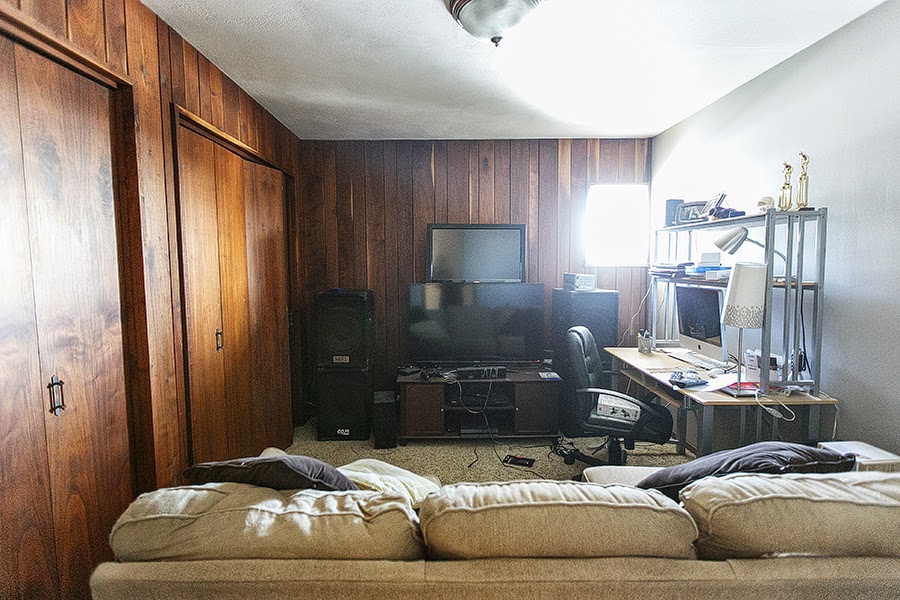
Brandon's office then:
And today: [not much changed, which I'm sure he's pretty happy about.  Though I would like to get rid of the boob light...]
Master bedroom before:
And now [the biggest changes are the actual grown-up bed, new-to-us lamps, a bit of art, curtains and NO ELLIPTICAL :) :)]
[I didn't do a great job of making the bed, but honestly, I really don't care.]

Here's a nice little vignette I enjoy; it has all my favorite stuff: vintage lamp, faux cow, jewelry, vintage glass vessels, pen & ink drawing, and of course Rocky :)]


Master bath one week in:
And now: [it seems a little set in its ways.... which I'm forming ideas on how to make it cooler]
Closet before, and one week in:
One week in and now [I did a teeny bit of organizing; not pretty, but it works! I sore of arranged all of my shirts/dresses by color, because that's how my brain works.]
Foyer from last spring [apparently I never took 'before' pics of it.... oops]
And now: [the palm bit the dust a couple months ago, so I got a new snake plant to match the other that I've had for a bit, and it's too big for the planter.  Soooo I need to rectify that somehow. When it's warmer outside.]


Laundry room one week in:
And now [also on the short list of cleaning up]
Other hall bath, lovingly known as the Dog Bathroom:
Exterior when we moved in:
And now: [technically this was from November, but it looks pretty much the same.  Just picture fewer leaves on the trees, and some snow on the ground]
THE END!   I hope you enjoyed the tour of our little house! 
Coming up soon are a few kitchen posts!  Which obviously we've done a lot of work on, but failed to share [shocked? me either.]

Friday, March 6, 2015

It's about damn time.

It's no surprise that MONTHS ago we got hardwood floors. You've seen them on previous posts and on instagram, but it just took me a while to put the finishing touches [and, actually, it's not technically finished - more on that later]
But even though it's been months, my love for these floors has only grown.  There are lots of upgrades we've done to the house so far, and this is in my top two [tied with my beautiful, beautiful kitchen counters] so it deserves its own shout out.
When we moved in, we both hated the carpet.  Loathed.  Carpet is nasty, yo.  Especially when you didn't put it in, and it's full of other people's dirt [a guy I know who installs carpet once told me that new carpet is a lot lighter than old carpet.   ummm.....EW.] But we just figured we'd wait a year or so and save up some money.  BUT - we were lucky enough to sell our old house remarkably fast!  Brandon had planned out finances based on us owning it for another 6-9 months [because that's what the market was looking like] so since we didn't have those extra expenses, hardwood floors moved waaay up the list! 
We looked at Lowes at their offerings, and brought home a few samples, but nothing was feeling right.  Since our walls are walnut we had to keep in mind a few things: 1.no walnut [because the walnut walls are remarkably beautiful and nothing should compete], 2. preferably something darker than the walls, and 3. something with a minimal grain [I didn't really want a trippy, wood-grain optical illusion, because the walls have beautiful grain].  Nothing really fit the bill.  So on a whim we checked a local flooring store, and the guy there [who I coincidentally graduated high school with] suggested this new floor they have, called Muirfield Maple Graphite from Mullican.  Maple has minimal grain, and it was a gray wood floor!  Didn't take us long to order the 5" wide planks and get on the list of very reputable installer.  Then the day finally came!  We cleared out the furniture and said goodbye to the carpet, its content, and its musty smell. 

Aaron, our floor guy, and his crew did an amazing job!  The dogs approved of them too :)
[iphone photos, obvi to instagram the progress]

We had our floor!  We just didn't have stair treads.  I decided to not use the floor planks on the stair, because I didn't want the busy lines on such large steps.  I opted for solid planks of maple, which were then ordered.
Once they arrive I got to work on mixing the stain to match the floor!
And Aaron came back to install the riser [which is 1/4' plywood that I had pre-painted black before he got there to install]
After the riser was put in and the steps installed, we had this [and, sadly, it looked like this for MONTHS]  I told him to just leave the finishing to me, because I'm a badass like that.  
Then the holidays came, and things were busy.  So that's why I didn't really get around to 'officially' blogging the floors until now.
So!  After I kicked myself in the butt I got 32 feet of paint-grade base shoe at Lowes [about $13 total] and painted them black in the garage [and took the pic with my iphone, because I'm lazy.]
And I measured and cut the miters, Amish-style with a hand saw and miter box. [I'm not to be trusted with power tools that can cut off digits.]
And took an afternoon to finish it off!  I ended up gluing it on with Liquid Nails because the angle made it difficult for my brad nailer to do any good.  Seemed to work pretty well.


Then I caulked the lines and painted it all smooth! [I SWEAR I thought I took pics of this step but I may have dreamed it.]  Then it looked like this!
BUT.  I opted to use painters tape on the stair tread while painting the upper riser, but I got lazy on the floor and just went slowly and carefully, and wiped up any drips.  Then I took the tape off of the stair, and IT RIPPED OFF MY POLY.  SONofaB!  Who'd have thought?!  I hate painters tape.  So now, instead of being pretty and finished, it looks like this:
I needed to sand and put a final coat of poly on anyway, but now I'll have to sand harder, and possibly do two coats.  So it's going to look like this for a few more months [keeping it honest, here]

Anyhoo.  The black riser and pretty, solid stair looks quite polished.  And I'm pretty proud of my stain-matching abilities, if I don't say so myself :)

And the floor never fails to STUN, and it looks so much brighter in here.  And swankier.  And it smells better.

A note about the rug: I knew I needed a LARGE rug, at least 8x10.  And I'm very picky.  I wanted something solid [or mostly solid], light gray, and not $1,000,000.  Which the best rugs seem to be.  So after lots of searching, I ended up finding a remnant at a Lowes in Ballwin that fit the bill - light gray, 9x12, and only $80!  Even if it's not the absolute perfect rug, it's perfect for now.  Plus, there have already been a few spills, and since it's carpet meant to be installed wall to wall and last for 30 years, shit just WIPES UP.  It's like it's scotch guarded.  It's amazing. 

and one last before and after:

So.  Much.  Better.