Monday, March 24, 2014

New Stools!

Our last post, I shared the progress of our first week in the house.  And I'm sure a few of you noticed my rusty yet shapely bar stools in the kitchen:

 Well now that view has improved greatly, because this weekend I gave them a bit of a makeover:
I had been casually looking for a few stools, but apparently counter height bar stools that are pretty [and preferably vintage] are either really hard to find, or they cost about $1000 each. So one day I saw that a friend on mine was selling these on facebook, and after checking the height [counter height!] I told her to hold them for me.  They were a whole $20 FOR THE PAIR. To freshen them up I got some spray paint, and found a remnant of the perfect non-shiny black vinyl at Jackman's Fabric for $4, and since this weekend was gorgeous, got to work!
To back up, here's what they looked like when I got them:
Fun shape, delightfully vintage, not too bulky or distracting from my gorgeous counters, and the price was definitely right.  SOLD.  All they needed was a little love!
 Materials needed:
1: Sanding block in 100 grit
2: '00' steel wool
3: 2 cans of spray paint [I chose Oil Rubbed Bronze because it matches my faucet, light fixture, and all of the hardware I'm -eventually- putting on the cabinets.  And because I'm addicted to that color] 4: A pretty place to corral the screws that keep the chairs together after you take them apart.
____________________
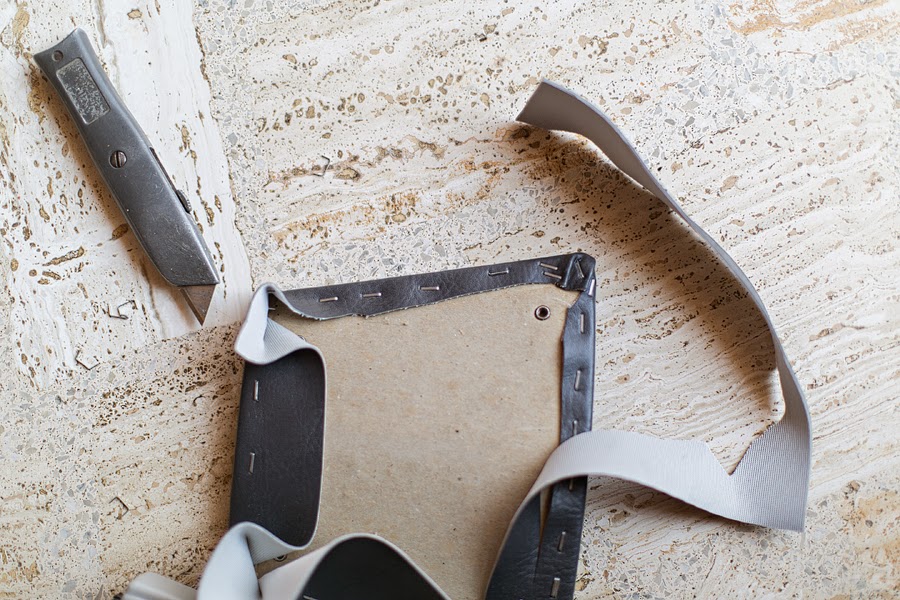
Step 1: Get started!  Figure out how the padded parts are attached, then unattach them.
Step 2: Sand every surface. The 100 grit was perfect for knocking off the rust and smoothing out the scratches.  After sanding them all down I went over them again with the steel wool to smooth everything else out really nicely to make a perfect surface for the paint.  This only took about half an hour.  Not too bad!
Step 3: Paint!  I did about 4 light coats, with about half an hour of drying between coats. Step not pictured because spray painting is messy, it was getting super windy, and I was feeling lazy with the photo-taking part.  [Tip: to get the ugly over spray off of your hands that will inevitably get on you, use a scrub with olive oil and baking soda to get it off]
Step 4: Slowly and painstakingly take out all of the staples from the old upholstery.  Sometimes you can just put the new fabric on top of the old, but the vinyl I bought was quite a bit thicker than the old vinyl, and I figured I wouldn't have the wiggle room for the extra thickness and have it still fit.  I was right, since it was still kind of a tight fit when I put them back together.  Also, if your floors seem to hide dirt and -in this case- rogue staples, keep a piece of paper nearby to put them on so you can see them and clean them up easier.
Step 5: Get to stapling.  Do one side, then do its opposite side while pulling tight.  Turn a quarter of a turn, pull tight and staple, then do its opposite.  This helps keep everything centered and not wrinkled as you work your way around the circle.

 Step 6: Trim off all the excess fabric.
Step 7: Repeat with the seat backs
 

And they're done!  After $20 for the stools, $6.76 for each can of paint, and $4 for the fabric, I found two lovely stools that fit the kitchen perfectly, for less than $19 each.

The kitchen is slowly but surely getting closer to being finished!

Monday, March 17, 2014

One Week In


So last Saturday, the 8th of March, we officially moved in!  It's still a work in progress, with most but not all of the boxes unpacked, but we're getting there.  Just so you can follow along and see it shape up [and so when rooms are finished sometime in the future it'll seem all the more impressive] here's how we looked as of Saturday March 15!
 the kitchen, back splash all grouted, new light fixture, and everything all put away.  I had to focus on the kitchen first, so I wouldn't go totally insane and end up having to move to completely start over.  I need order in the kitchen, first and foremost.  [still completely enamored with my new light!!]  ...have I shown you our new kitchen table yet?  I can't remember.... either way, I love it too.  It's vintage, super heavy and sturdy, comfy, and definitely mid-century.  When I decide to get my act together, those chairs will be recovered, and it will be perfect. [also, I found very cool bar stools, which apparently are hard to find, unless you want to pay a million dollars, and as soon as the temperatures are more consistently warmer, they'll get a fresh coat of paint]
 looking the other way, the room that went unnamed for the intro post, but we have - for now, anyway - named the Magnitude room.  [because with the new gray built ins, the fun stuff I'll style the shelves with, and when the ceiling gets its coat of white paint, will definitely Pop.  Part of Magnitude's catch phrase.  We're TV nerds.]
 From the kitchen, you can see into the dining room, and straight to our TV [which also means we can kind of be adults and eat at a real table for dinner, but still kind of kids, because it's obviously better to watch TV while eating]  Aaaaand from this vantage point all I can see are two light fixtures that must GET. OUT. OF. MY. HOUSE.
 The living room is livable, with our new couch all set up [which arrived broken, and explains why there is a massive amount of cardboard in there for now; once we get the info back from the company where we bought it, we have to ship it back in its original packaging.  It also kind of smells like cabbage....I'm assuming that's unrelated but I thought I'd throw that out there.  At least it's pretty.]  Brandon mounted the TV above the fireplace, and it looks amaaaazing so far!  we have to wrangle the cords, but I'm definitely in love with it.
 I need more lamps.
 [you can kind of see the bent leg on the bottom right; Brandon was able to bend it mostly back, and since we're short people we don't put too much pressure on it.... I'm still pretty annoyed by it all.]
my beauty :)

the dining room is getting there; I just need to put everything away [and save up some $ to replace the ugly light with something gorgeous]  Side note - we bought that table, chairs and buffet when we first moved to Farmington 7 years ago.  It was $250 and probably my favorite vintage furniture purchase ever.
Here's the hall bath, still beige.  I did put a few of my succulents in there the day we moved, just to sit them down to be safe, but I like them there.  It's nice :)  I have a few ideas to freshen up the space a bit in the near future, even though I want to chisel out allllll of the tile, but it'll be cute soon.  Stay tuned.

 
 My office, in progress.  Not completely put away, but definitely works!  At least my desk is in order, and I can get some work done.

 Brandon's office, which has to be our router station for now, until I can run a phone line across the hall into mine. [super tricky to photograph this room; that one tiny window in the corner, and completely dark everywhere else]

 Our room is kinda shaping up [also super tricky to photograph this room...]  And it's gonna be where the elliptical lives [not ideal, but better than in the living room]  Since Saturday I'm trying out some new lamps, and I put some art out, but it's all still evolving.

 Master Bath.  Still beige.  Paint going up soon [I just have to settle on what color....which sometimes it's really easy to know, but in this case, it's super tough.], but like with the hall bath, I just want to take out the tile.  And the faucets.  And the shower faucet.  And the light fixture...]
 Our closet is full, but I need to actually utilize all of the shelves & drawers we have available...
 my laundry room, with my new fancy washer & dryer!  All of the stuff that is out should really be put away.... later.
And another bathroom that I think I left off the intro post!  It's across the hall from the laundry room, and just off the garage entrance. I love this tiny bathroom.  The tile is original, and there's a low tub in there too [also in the beige-y color.  Oddly enough, this beige I'm totally cool with... probably because I know it's vintage.  That tends to sway my thoughts about stuff.]  The tub has a little handheld shower, and so I started calling it The Dog Bathroom, since that's where the pups will get their baths.  Since I called it that, I decided I'm going to put dog artwork in there, starting with a little 8x10 acrylic study I did before doing the official Stella painting, and more will be going in soon, after I paint the walls.  It's cute ;)

Tuesday, March 11, 2014

Changes are happening!

Sorry for the long silence - the last few weeks have been a whirlwind of quickly getting projects finished, and we've actually moved now!  It's chaotic around here, but it's definitely coming together.

The first time you saw the kitchen, it looked like this:
Then after I ripped out the backsplash, it looked like this:
Well, after waiting two weeks for our beautiful custom counters to get installed, suddenly the kitchen looked like this:
Soooooo pretty!
I took this pic while the install guys were there [of course I had to keep Instagram updated!]

And that's not all - right after it went in, during one of the moving days, my mom and I tiled:
And this morning, I grouted!  The kitchen is coming together - stuff is in cabinets and everything - so that's helping to keep my sanity during all of this mess.

BUT THAT'S NOT ALL THAT CHANGED!
My dad took out that big nickel chandelier from two pics up, and replaced it with this beauty:
[um, yeah.  the mess.  It's better today than yesterday, but only a teeny bit.  Still a work in progress :)]

Sorry for all of the iphone pics.  My computer and office aren't quite put together yet [and I'm actually blogging from my laptop at my mom's house, haha].  Once I get the finishing touches I'll take the 'official' pics with my big-girl camera, and get a full kitchen post up!

Sunday, March 2, 2014

LOTS OF PAINTING

Though this will be a kind of boring post, this is the stage we are with the house, and it's slowly transforming into something that feels like 'us'!  
From Thursday through Saturday, it was painting time.  My mom helped me knock out 4 rooms in one day.  We painted the master bedroom, my office, the laundry room, and Brandon's office [the house has 4 bedrooms, so we can both spread out ;)].  
First up: the master bedroom [mom got on the tallest ladder and did the tall part, due to my near-crippling fear of heights]


A nice muted mossy green to bring out the color of the wood.  It'll go nicely with our charcoal gray drapes and bedding, and some dark furniture I'm planning. It'll hopefully end up being an uber cool moody cave, with some funky 60s and 70s throwbacks [anyone who knows me is not shocked]

_____________________
My office: kind of a sage green before, that somehow felt sad.  The walls were also super dirty and marked all over with pencil & crayon. [I also inherited some old curtains!  which are now dropcloths for painting and other various projects]

Now a nice, neutral greenish-bluish-grey.  [and with much better curtains!] 
Very calming for hours upon hours at the computer, and a nice base for colorful artwork and office supplies I'll fill it with.  And at least now it's really clean.
___________________________
The laundry room: before, beige [of course]


Now the same greenish-bluish-grey as my office.  
I have this color in my current kitchen, and I've been obsessed with it for a few years, hence picking it for the hew house.  It's an easy neutral that works extremely well with all of my favorite bright colors: teal, mustard, orange, plum, emerald, etc.  Plus, with everything else going on, I didn't want more to think about.  I just went to Wal-Mart [yes! Wal-Mart! they have great quality paint, and I usually find any color I'm looking for] got 2 gallons of Dusty Miller, and it was done.

Aaaand I forgot to take pics of Brandon's office.  It wasn't originally in the plans, but I found a nice gallon of grey paint in my basement, so I tossed it in the car.  Mom painted it, and now it's gray [and wood.  Of course there's wood ;)]
______________________
Also on Thursday, I started working on my built in shelves & cabinets off the kitchen.  Did you think I was going to let them be pinkish-beige for one. minute. longer?

For starters, I really don't like the placement of the hardware, so off they came.  I filled the holes with putty, let them dry, sanded them, and filled them again, on Thursday.
Then Friday I taped my new inherited dropcloths over the stone hearth, and spend h o u r s priming them.  [I'm a huge fan of this stuff, which I had tinted a medium grey.  It sticks like nothing else - I've had the same gallon for about 6 years and have used it a ton, even for painting formica counter tops]
So Saturday they were ready to paint!  Brandon and I loaded up the car with more stuff to move down [slowly but surely getting stuff out of the old house into the new one], and mom and I tag teamed this B, and by the end of the day, the beige was gone:
The color is Falcon, from Valspar; dark grey is tricky, and it took me forever to find one that's dark, but not too dark, neutral, but with some green undertones, but not too green.  [Brandon's a lucky guy, eh?]  I LOVE the way it looks against the walnut, and with the stone. 

Now we just need our quartz counters to arrive, then I can tile the back splash, and we can move in and load up the cabinets!