Showing posts with label progress. Show all posts

Tuesday, January 12, 2016

the Battle of the Beige continues...

House projects took a break while our little Bea was cooking [with exception of getting her nursery together, of course, and a few rooms that benefited from the week of nesting that took over me right before she arrived.  I'll blog those tiny updates soon!] But she's two months old today, and I'm itching to get back to making our house look like 'us.'  Specifically with our master bathroom.  The layout is pretty good, with the exception of a few things, but it's still very, very beige.  If you remember, every single room in this house was painted beige, so I've been waging the Battle of the Beige for almost two full years now, slowly painting over it [and in the case of the kitchen, getting the miles of ugly beige tile ripped out].  How many times can a blog have the word 'beige' in it?  I'm probably at a couple hundred by now...
Anyhoo, our bathroom is the last beige room of the house, and one of the worst offenders, which is why I'm ready to GET. TO. IT. 
Now, I'd really really love to rip out everything, get all new fixtures, a sleek vanity, and install a ton of tile in a pretty shape/color/texture, and make it new while keeping with the Mid Century Modern feel of the house.  Something like this:
found here
 And while you're clicking links, check out my bathroom Pin board to see lots of pretty bathroom inspirations
_____________
BUT.  That would mean a major reno, and a lot of dough.  So it's pretty far down the list of areas to spend on, as we have a few big projects coming up, and we have 4 large sliding doors that need replaced.  Especially considering that the bathroom layout works pretty well, and its only downfall it the fact that it's very ugly.  So I'm going to do what I do best - paint it to make it prettier!

Here's what we're starting with [this is from a week after we moved in, in March 2014.  And it still pretty much looks the same - just a different rug, and I moved the laundry basket]
While trying to decide what to paint and what color, I thought maybe a nice olive green on the walls, since that's what is painted in the master bedroom [you can see a pic of it in the 'One Year' post.  Which, now that I dug back to find the link, I found a pic of the bathroom with the new rug and without the laundry basket.  Oops.]  The room gets basically no light - you have to turn on the lights at all times of the day anyway - so I'm embracing it and going dark and moody.

I fell in love with olive walls when I saw this bathroom:
[from one of my favorite blogs, Little Green Notebook - go add her to your feed now!]

So I took to Photoshop to add in the changes I know I'm going to make, and added in a muted olive wall:
I like it, but I'm pretty sure I really like the LGN olive bath because it's paired with black, white and grey.  It's so clean and pretty!  Since I'm going to keep my miles of beige tile [for now] it doesn't quite have the same effect.  
So I think I'm going to use my go-to color - grey.  In particular, a nice *slightly* warm charcoal. 

Better!

Because gifs are fun, and because it's crazy to see how little changes make such a huge difference [even making the cabinets black changed the look completely], here's a gif!


After watching the gif over and over [I can't get enough, haha] I think I maybe don't want big statement art in color.  Maybe black and white?  [most likely a photo, since I have a lot of those already, and as much as I'd love to paint something, there's just no time.  I can barely just keep the house at a passable level of cleanliness while making sure we all eat.  Ordering a print is very doable.]

So I made the quickly-and-crappily-rendered art black and white:
And I think that's it!  

It's not clean-lined or MCM by any means, but it's not beige.  I won't cringe every time I go in there, and we can put off the $10k reno for a few years.  Pretty soon I'll set to work on painting! [and I'm oddly excited]  I think I'll have $100 in the paint and hardware for the cabinets - not too shabby!  I'll decide on something for the light fixture [but I'll probably just paint that too, because I pretty much hate all fixtures of this type, and I'm not going to spend any money on something that I still don't like] and when it's all finished I'll blog the reveal and how much [or, actually, how little] I spent!


Friday, May 22, 2015

BIG plans for the guest room!

There are a few rooms that have been SERIOUSLY neglected since we moved in, while we focused time + energy [let's be real - I really mean money] on the rooms that people see the most. The stuff that's on the blog, and that I actually want to share.
One of those rooms is the guest room.  The poor, neglected, still-beige guest room.  The last time it was on the blog was for the Six Month Post - I didn't even deem it necessary to include it in the One Year post!  So here it was last fall, after we had lived here at the Haus for 6 months:
And I guess I didn't really want to include it in the One Year post, because little had 'officially' changed, as far as purposeful design.  In all reality though, it did change - this is how it looks today.  [just keeping it 100 on the blog - I'm sure all of you have neglected rooms that look the same.  ....please tell me you do!] 
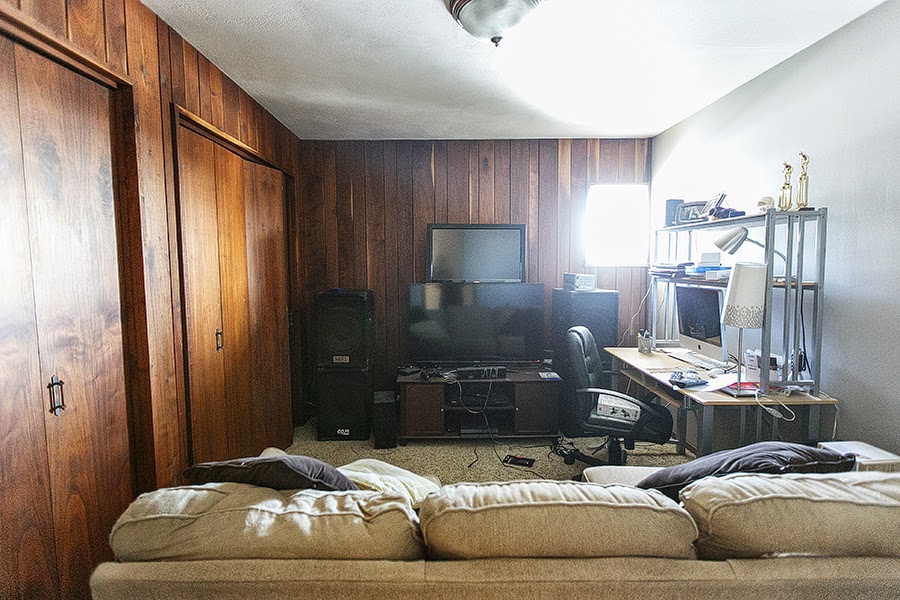
The treadmill has its home here, along with a TV & an old PS3 [because how do you spend an hour on the treadmill without streaming Sex and the City to keep you company?]  Along with all of my wrapping gear that I parked in here at Christmas, some random stuff that needs to go to Goodwill, and a dresser [and a headboard with bedrails, that are just out of the frame] we recently inherited.
It's pretty much a mess.  Doors are closed at all times to minimize embarrassment.
BUT!  Its time has come!  In our continued effort in the aforementioned 'Battle of the Beige' we've waged at the Haus, we've decided to spring for new - NON BEIGE - carpet in the master bedroom, guest bedroom, and hallway.  All rooms that will make a HUGE impact. 
I went carpet shopping at the same local place we bought our hardwood flooring, and brought home a palette of swatches to see which is best:
I picked a low-pile carpet, in a pattern mix of berber and cut berber, for a nice subtle pattern that has an organic feel.  While choosing the perfect color, I held it up in just about every room, in every light, against the wood wall, the stone wall, and the marble floor, to make sure everything was perfect.  I of course was looking at the greys in the palette [you know, because of the 'Battle of the Beige'] 
I settled on the bottom left swatch, named 'Destin' because it's super classy like that.  It's a nice neutral [but still warm] grey, that suited just about everything.  Light to brighten things up, but not too light that we'll also have to wage a war of the 'Battle of the Puppy Prints' everywhere. 
I can't wait to see how it brightens up our room, how it looks when you see the end of the hallway carpet against the marble floor, and how it transforms the guest room to make it look 'ours.'
In addition to the new non-beige carpet, I'll also paint the walls [because over a year later, they're still - you guessed it - beige], and I'll paint the wedge of wall above the wood & painted walls a really bright white, to keep it light and airy in there [they're also beige, just a lighter tone of beige.  But....beige.  How many times can I say 'beige' in one post?]
I'll also be adding some new, thought-out furniture, instead of using the hodge podge of hand me down stuff, and leftovers from the old house.
Just to get an idea of how it'll look all together, I did some crude photoshopping to see how the new carpet and wall colors will work in there, along with some new furniture. 

Check it out!

What do you think?!

Yep - you guessed it - I got knocked up [4 months pregnant now, actually!] and the new, purposeful furniture in the guest room will transform it into a nursery!  [as soon as I found out I was pregnant, the new carpet jumped waaaay up the list of 'to do' around here]
I photoshopped some stuff in that I know will be in here, or just a general idea of it.  MidCentury [duh] with an eclectic mix of colors, patterns and textures for a comfortable boho vibe.  I think :)
This is just the 'gender neutral' version - we'll actually find out next Thursday if it's going to be a Girl's room or a Boy's room, and then after the carpet is installed, the fun can begin!

Stay tuned for updates!

Monday, May 18, 2015

Grand Entrance

The long driveway of the Haus of Pane is marked by a beautiful mailbox. See?
Yeah.  Pretty far from that.  Nothing against a plain white mailbox - it gets the job done - but this one has clearly seen better days.  It's almost always missed when I give directions on the phone, thus the driveway is missed, and pizzas get cold while waiting for the driver to find the house.  And it must just be invisible to everyone, because I'm certain it's been hit.  A lot.  Last fall I noticed the door was open, tried to close it, and it didn't line up - so I think it was hit overnight.  The door falling open was a constant issue too - our mail would sometimes be wet inside of the mailbox.  Not just damp from raindrops while exposed between the post lady's car and our box - letters would look like they took a swim in a pool for half an hour, then made their way inside the box to sit in their own puddle. 
It didn't take long before we had had enough, and vowed to rectify the annoyance as soon as the ground thawed. 
[fast forward to April, when the ground thawed]
We sketched out a few ideas of stuff I had floating in my head - I wanted it to look MidCentury Modern [or at least reminiscent of that style] but not break the bank.  Did you know that the really cool mailboxes out there can cost a few hundred bucks?  For JUST the mailbox?  I love this one, but I'm certain that's just the box.  Post is sold separately.  And I'm just too much of a tightwad for that ;)  So! I designed something that could incorporate a normal-priced mailbox, and add some decorative bits for pizzazz [people just don't say pizzazz enough].  Said decorative bits were to be simple, but large enough to incorporate large numbers [so people can, you know, see them] and I wanted a nice angle to echo the angle of our gorgeous house.
Once we decided on a mailbox - super simple design in classic black - and a post [nice and sturdy in case it gets hit], and decided the decorative bits would be made from 1x8 boards, I made a crude sketch in Illustrator [to scale, of course] to make sure all the numbers were going to work out:
Brandon set up shop in the garage and did all the cutting, and I did a loooot of sanding:
Then there was priming and painting and drying [photos MIA.  but I'm sure you can imagine what painting looks like]  We went with the same grey as the house, so everything matches!
We picked these numbers [which look a lot like these Neutra numbers but a whole lot cheaper]
And then it got a little weird.  The installation calls for drilling a hole a little larger than the screws, put the screws in the number, put a bunch of silicone in the holes, then dropping the numbers & screws into the holes.  So you basically glue them onto your house [or, in this case, 'decorative bits']
Problem is, the screws were longer than the thickness of our boards, and they'd stick out the back, so we just decided to glue the things on, sans screws.  Taking out a step is always fun.
Seems good so far!  I'll of course keep you posted.
THEN!  After two weekends of solid rain that foiled our best laid plans, we finally had some sun on a Sunday afternoon.  And my digger got to digging.

"Oh, no!  Sorry, Brandon I guess I'm just bad at digging - and you're really good at it"  ;)

He dug the hole with a post hole digger, flattened the area around the decorative bits to make room for it to spread out and be even, and then mixed the cement so the whole thing is more permanent-like.

For a few hours they existed as equals, though everyone that passed the two of them knew they were far from equal.
And - on a Monday morning - I killt it.  
[then my digger had to work super hard to get the base out of the ground - turns out it was about 3' long, all underground.  I was legitimately shocked.]
_______________________
Soon after, Phase 2 happened - the prettification of the mailbox!
To set it off, and to keep the grass from getting tall and obscuring our beautiful numbers, we made a pretty rock bed all around.  We chose white marble rocks, because they fit with our clean look, but were also surprisingly cheap!  $3.78 a bag, and while it took 5 to fill up the bed, that's still less than $20 to make it look super fly.
Add a perimeter of paver stones to keep the rock bed in check [about $1.15 each] and it's done!

The mailbox itself has a magnetic closure, so no more door hanging open!  And the flag is metal too!  Feels nice and sturdy.  And if you see the back, you see the brackets my metalsmith [Brandon, as I mentioned in the previous post] made and powder coated in black.  The brackets are attached to each board with screws, each board is attached together with hidden dowels, and they have a 90 degree turn which is attached to the steel post.  This thing isn't going anywhere.  [And if someone hits our mailbox now, I kind of really hope it does damage to the hitter's car.]
This summer the grass will fill in, and in the fall I'll plant some bushes around the box and on the other side of the drive [for symmetry, of course], and we'll finally have ourselves a pretty entrance!
______________________

Everything seemed perfect for a week, then we both noticed a few times that one of the paver edges looked wonky.  One time I fixed it, and once Brandon fixed it, and it happened again.  Which means our mail lady is running over our it with her mail-mobile. 
This means war.  I have ideas for defense/retaliation.

Monday, March 9, 2015

ONE YEAR!

That's right, we've been in the house for ONE WHOLE YEAR, as of yesterday, March 8. We've technically owned it for one year and a month, but that first month was busy with painting, kitchen demo, new fence and gutters, and other various preps. But we moved in on March 8, 2014, so we've officially lived here one year!
Having this blog is super helpful in reminding us of how much we've done.  I tend to get bogged down in lists of stuff I want to do, and all I see are things that need to be fixed/changed/upgraded, but holy crap, we've done so much!  And without the blog as an excuse, I wouldn't have ever really taken before, progress, and after photos, so this kind of milestone wouldn't be near as rewarding.
So!  Let's take a tour of the house, shall we?
First up: the kitchen:
Above is how the kitchen looked when we bought the house [and the pretty Wegner chair in the desk area was a housewarming gift from my parents], below is how it looked one week after moving in [because the bulk of the kitchen redo happened in the month between closing and moving]
And now: [one of my absolute favorite transformations in the whole house!]
Looking from the kitchen into the Magnitude room [named for the Community character, because we're dorks], one week in:
And now:
Here's another view of the magnitude room, from when we bought the house, nabbed from the intro post:
and today:
[I adore those vintage couches I scored last summer, but still haven't gotten around to covering the ugly back side...]
Here's a view of the built ins, in their beige-y pink state when be bought the house:
And today:
The view from the other side of the kitchen to the dining room, which when we bought the house was just a showcase of some of the most ....unfortunate... light fixtures in the house:
And now [SERIOUSLY improved by prettier lights]:
Living room fireplace one week in:
Now:
Living room one week in:
Now:


Super fun iPhone pano taken from the first time we saw the house, also nabbed from the intro post:
Copycat pano taken today:

[this corner view shows how much better the eaves look white as opposed to creamy yellow]
Dining room:
[another runner up for 'most improved' mainly due to light fixture awesomeness]
[Sadie likes to tuck in her feet when she lays down.  Because she's a weirdo.]

Down the hall to the hall bathroom, here it is one week in:
And today, a tiny bit less beige:
The plants then:
And now, sadly, they look a little unhappy....  When it warms up I'll replant them and attempt to make them perkier.  And look!  I hung some art on the back wall!
My office one week in:
And, sadly, today.  This is definitely the winner for 'worst attitude', which I will rectify in the near future.
Brandon's office then:
And today: [not much changed, which I'm sure he's pretty happy about.  Though I would like to get rid of the boob light...]
Master bedroom before:
And now [the biggest changes are the actual grown-up bed, new-to-us lamps, a bit of art, curtains and NO ELLIPTICAL :) :)]
[I didn't do a great job of making the bed, but honestly, I really don't care.]

Here's a nice little vignette I enjoy; it has all my favorite stuff: vintage lamp, faux cow, jewelry, vintage glass vessels, pen & ink drawing, and of course Rocky :)]


Master bath one week in:
And now: [it seems a little set in its ways.... which I'm forming ideas on how to make it cooler]
Closet before, and one week in:
One week in and now [I did a teeny bit of organizing; not pretty, but it works! I sore of arranged all of my shirts/dresses by color, because that's how my brain works.]
Foyer from last spring [apparently I never took 'before' pics of it.... oops]
And now: [the palm bit the dust a couple months ago, so I got a new snake plant to match the other that I've had for a bit, and it's too big for the planter.  Soooo I need to rectify that somehow. When it's warmer outside.]


Laundry room one week in:
And now [also on the short list of cleaning up]
Other hall bath, lovingly known as the Dog Bathroom:
Exterior when we moved in:
And now: [technically this was from November, but it looks pretty much the same.  Just picture fewer leaves on the trees, and some snow on the ground]
THE END!   I hope you enjoyed the tour of our little house! 
Coming up soon are a few kitchen posts!  Which obviously we've done a lot of work on, but failed to share [shocked? me either.]