
I see a wood door and I want to paint it black*
The front doors were one of the [many] things about this house that we fell in love with. Certainly unique, and definitely well-built, not to mention they were meant to be with this house. The architect and original home owners decided on these, so there was no question that they should stay here. That kind of purposeful design is what Brandon and I are drawn to buying, and saving. What kind of MCM enthusiasts would we be if we just replaced them with plain metal doors? [which would honestly be all we could afford. intricately designed wood double doors would not be surprisingly cheap; they'd probably make my heart stop.]
They had definitely seen better days, but were structurally sound. Before another wet, cold winter sets upon us, I staged a door intervention to make prevent further deterioration.
This is how they looked the day we first saw the house:

Here they were a few months ago [already I feel like the hot summer has taken some more toll - the color looks a bit more faded than last December]

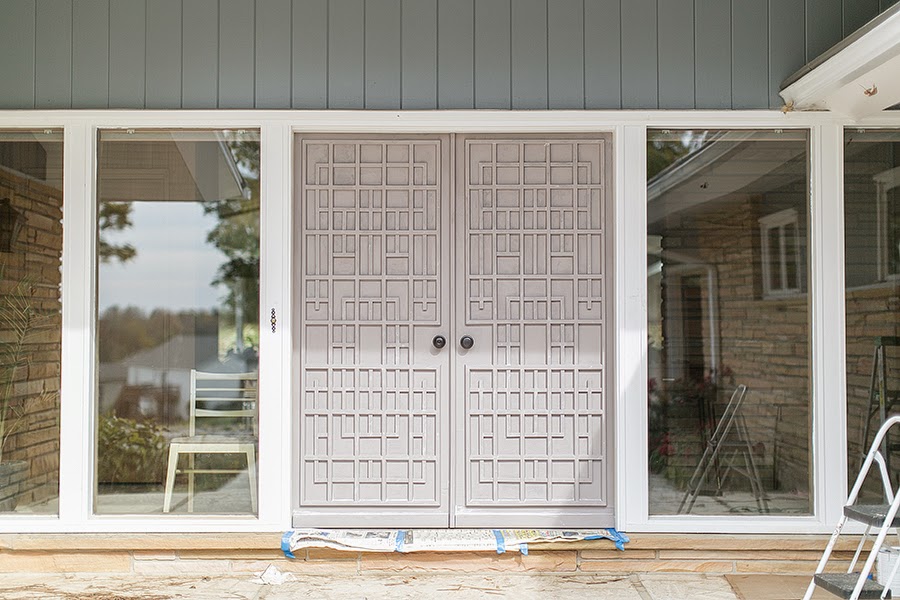
And here they are now:

I had been brainstorming about it all year, deciding what to do [doors on or off? what color? how the heck do I sand all this?!] But first thing was first - we had to make them stronger, and we had to make them work better. Over the years, lots of use had split the astragal [I learned that word from The Adam Carolla podcast, but had to google it for the spelling ;)], making the latch mechanisms less effective [so pretty much, if someone kicked reeeeally hard a few months ago, they probably could have kicked in the doors, 80s action movie style]. And while I was at it, the upper latch needed to be cleaned, as it didn't want to move at. all.] Here's what they looked like:

b. pull off the whole astragal, so I could get to the latches to properly clean them
c. clamp the bottom split part and glue it back together.
Luckily, I only got to the first part when I realized it could be easier than that! I pulled out all of the screws, then found that the upper latch worked absolutely fine. I attributed the non-workingness of it to the bottom not being properly aligned with the slot in the floor, so the upper latch probably wasn't latching into the correct spot. So I moved on to the clamping and gluing.
I used J.B. WoodWeld for this job, since my parents have raved about how quick, easy, and super strong it is. And it is! Squirt an equal bit from each tube, mix it together, apply to the spot that needs fixing, and it's done.

It says 'no clamping necessary' but they clearly hadn't seen my door. So I clamped it.

BUT. That's when my hunch about a couple of the screws proved me right. There were these two holes at the top, on the inside [clue #1 - no other screws were visible from the inside of the house when the doors were shut, and clue #2 - they were super shiny - i.e. new] So when those two screws were put back in, the latch didn't work again! So at some point, the previous owner fixed a split astragal with screws.


So I kept out the screws, scraped out the bit of wood putty that was in the crack with a knife, and put that WoodWeld in there too. Done!
Now I could get to the bigger job - the painting. Which of course involves a ton of prepping, especially with these doors. These doors were covered in a veneer, which when outside, needs a lot of maintenance. So over the years, day after day of the hot afternoon sun had shriveled up that veneer, and it had to all come off. Here's an instagram pic of the day I started:

It came up pretty easily, especially on the bottom 2/3 of the door. I also used a utility knife around the trim pieces to try to get a really clean line.
And after hours of scraping, here's what they looked like:


I was certain it wasn't original to the door, so I ripped that sucker off. [and quite easily, I might add]
The two-toned aged veneer underneath justified my decision:

With a door as purposefully laid out as these, the spacing around the edge of the trim should have been the same all around the door. And it was! Originally, anyway. I just figure the bottom of the door, which sees the most exposure to the elements, was the first to decay. So the original trim piece came off, and a bigger one went on, to cover up the old veneer. Most likely because someone knew the H U G E job it would become to take all of the veneer off. But I was there to restore, renew and refresh, so I ripped off that old veneer too. [again, quite easily. I just pulled it off with my hands - no scraper needed]

So! After all the old veneer came off, the whole thing got a good sanding, which I did with the Black & Decker Mouse, and its nifty pointed surface [for all of the tiny areas that make up this door]. So - that bottom trim that I had ripped off? It turned out to be walnut, super sturdy, and aside from the weathered outside, very strong. So I took the pieces over to my Dad to have him rip them down to the size they originally would have been. [bonus of moving back to your hometown: access to all of Dad's power tools, and Dad to use them for you ;)]
And after the good sanding, and some small holes filled, they looked like this, #nakedandafraid:
Which revealed that all of the tiny nail divots showed up a lot more than I thought they would, so I caulked them along with mitered corners, and of course where the trim meets the door [I should be able to power wash these doors, and no water will creep in to destroy them]


I used Rustoleum Topside Marine Paint,
because it's meant to withstand a lot of extreme weather. I definitely
don't want to have to sand and paint every couple of years - I want
this to LAST.
Why black? I also debated on this a bit - a fun
color would be nice! But honestly, I can't think of a color I'd want
for the doors that I'll love for years. And again - I don't want to have to
do this again for a long time. Plus I fell in love with the classic
black lacquer doors in London, so I didn't have to waffle on colors for very long :) On it went!
And that, my friends, took a loooong time. I'm using a 2" brush in that pic, but ultimately ended up using a 1" brush. The smallest little rectangles are about 1.5" wide, and the small brush allowed me to be super anal about brush stroke direction, which ultimately makes for a smoother, prettier paint job. I thought about a sprayer, but some of the trim pieces [like in the left half of the pic above] are 90 degree angles, so I felt that would also take a while, and cause for more drippage possibility.

So I painted my double front doors with a one inch brush. Three times. And in the spring [once I have a bit of separation from the project and my eye doesn't twitch when I think about it] I'm gonna put an other coat on, just so it's suuuuper glossy and smooth.
Just for fun, I made a gif of the different stages!

While I was on the black door kick, I turned my sights to a back door of off the kitchen. It, too, was a solid wood door with an aging veneer:


[but this time I got to use a big roller for the job, so each coat - one of primer, and one of paint - only took about 5 minutes]


Much better, and cleaner :)
Google images shows album covers that say "Paint it, black" and "Paint it black" Those Rolling Stones are never going to get anywhere in their careers if they can't get their shit together over something like how to spell a song title....
Megan, Everything is looking great! I just love seeing what you've done!
ReplyDelete