So last week I posed a question to everyone: should the armchair in my living room be teal or grey?
The overwhelming response was teal. But the very evening the post went live - not exaggerating - I spotted this lovely little number on South Jefferson MidCentury Modern's instagram post, and saw big puffy hearts all around it. Showed it to Brandon, and he loved it just as much as I did [he's good like that - we like almost all of the same stuff. Makes putting this house together pretty easy :)]
And as luck would have it, I was available to go to their shop the next time they would be open [they're only open on Saturdays, and as a wedding photographer, that's pretty magical that I would be able to go!]. So I grabbed my friend Tracy, and we pulled up to the shop at about 11:50. There was already a line of a couple dozen people, all waiting to get in at noon when they opened their doors! Not gonna lie - I got really nervous and kind of competitive. Sweaty palms aside - as soon as we could get in the door, I quickly swept the shop until I finally found it in the corner and made a beeline right for it. It. Was. Mine. And I brought her home! Those who follow my instagram have already seen it a few times [and for just haus-related stuff, check out the new one here!], but here she is, in all her glory:
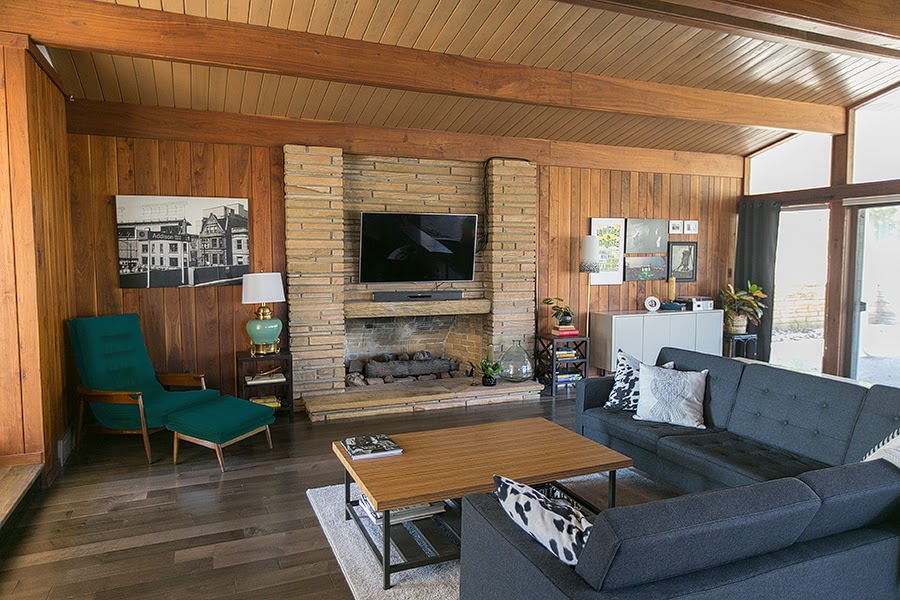
Fits perfectly, dontcha think?
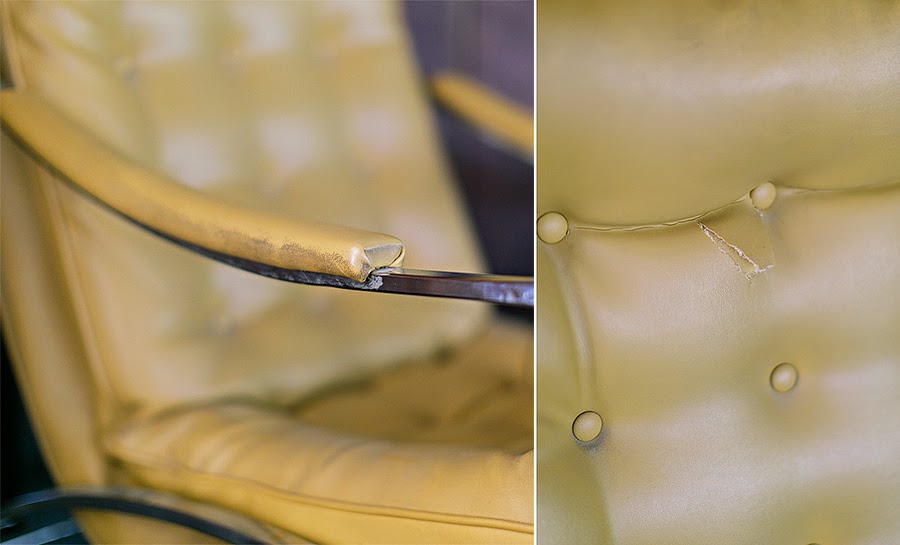
I'm a fan of the color, but not for this chair, in this spot. Lots of warm wood and a bit of yellow in the stone would just be way too much yellow with this chair. Plus, the vinyl has seen better days...
But those lines tho...
So she'll be getting recovered in black, and she's going to look like $1,000,000 [a million bucks.] ;)
So everyone wants to know, what about the other chair? I still love that chair, and there was a perfect corner in our room for a comfy armchair [and place to hide shoes & dog toys under] so I put it in there. We were actually looking for a chair for that exact spot, so everything is working out perfectly!
[lots of dog toys around here. Just keeping it 100. Though I did make the bed and dust a little before I took the pic]
I still want to get it recovered, but that'll be on the back burner, since it'll take a lot of fabric and won't be cheap. And no one sees it. Still thinking teal though - it'll just look so pretty against that walnut!
[there's frequently a beagle on the bed, and at least one toy underneath]
Stay tuned to see the update once I get the new chair recovered! I just have to actually *call* someone about that. I hate doing that.
Thursday, February 12, 2015
Wednesday, February 4, 2015
Just call me Megan Draper.
Because my name is Megan and I just put some drapes on some windows.
After we got those beautiful hardwood floors laid [which, yes, I still owe you a post! actually, I still need to put the finishing touches on the floor itself first....] we had a bit of an echo problem. Surprising, right? I mean, it's just a ton of wood, stone and glass - why in the world would there be an echo?
So I set about finding the perfect drapes, so I can keep the clean lines of the windows, without froofing things up too much.
I settled on a simple set of charcoal gray blackout panels, with a subtle sheen and texture. I didn't want a crazy pattern or color to draw too much attention - just something simple and clean. JCPenney for the win! Found a pair for $40 a panel, with a grommet top to keep things extra lovely.
Did you know it's incredibly hard to find affordable, really simple curtain rods? Everything I saw [even at Target! for the first time in my life, they let me down. It was a sad day....] was too frilly or scrolly, and just too overdone. But on a whim I decided to pop into Kohls, and they had exactly what I wanted. Simple, clean and dark, so as not to draw too much attention. And as a bonus, they were on sale for $14 each!
Anyhoo. I'm sure curtain talk is just as exciting as you thought it would be, but to change it up, here's another before and after:
Just enough to muffle some sound, soften edges, and when closed we can become hermit-like cave dwellers and binge watch Mad Men all day.
SIDE NOTE. In the precap of the year [see what I did there?] I posted in January, I added 'get chair upholstered' in the list. Here it is, all avocado, matted and funny-smelling in the corner:
I was dead set on a dark peacock tweedy-textured fabric for the chair. But then on Pinterest the other day I came across this lovely photo, which looked strangely familiar:
So, dear readers, I need your help!
I've crudely photoshopped both options - teal and grey - so you can help me decide! Put your vote in the comments so I can make a damn decision!
1:
2:
Then once I make a decision, and make a phone call like a grown up, I'll get it reupholstered and she'll look all shiny and new :)
After we got those beautiful hardwood floors laid [which, yes, I still owe you a post! actually, I still need to put the finishing touches on the floor itself first....] we had a bit of an echo problem. Surprising, right? I mean, it's just a ton of wood, stone and glass - why in the world would there be an echo?
So I set about finding the perfect drapes, so I can keep the clean lines of the windows, without froofing things up too much.
I settled on a simple set of charcoal gray blackout panels, with a subtle sheen and texture. I didn't want a crazy pattern or color to draw too much attention - just something simple and clean. JCPenney for the win! Found a pair for $40 a panel, with a grommet top to keep things extra lovely.
Did you know it's incredibly hard to find affordable, really simple curtain rods? Everything I saw [even at Target! for the first time in my life, they let me down. It was a sad day....] was too frilly or scrolly, and just too overdone. But on a whim I decided to pop into Kohls, and they had exactly what I wanted. Simple, clean and dark, so as not to draw too much attention. And as a bonus, they were on sale for $14 each!
Anyhoo. I'm sure curtain talk is just as exciting as you thought it would be, but to change it up, here's another before and after:
Just enough to muffle some sound, soften edges, and when closed we can become hermit-like cave dwellers and binge watch Mad Men all day.
SIDE NOTE. In the precap of the year [see what I did there?] I posted in January, I added 'get chair upholstered' in the list. Here it is, all avocado, matted and funny-smelling in the corner:
I was dead set on a dark peacock tweedy-textured fabric for the chair. But then on Pinterest the other day I came across this lovely photo, which looked strangely familiar:
[from this tumblr]
And I fell in love. The colors and textures are amazing, and I noticed that all of the furniture is grey. I assumed in my house all grey would be a tad flat, but this......this is amazing. DAMN. Now I have no idea. [and I don't need help in the waffling on decisions department]So, dear readers, I need your help!
I've crudely photoshopped both options - teal and grey - so you can help me decide! Put your vote in the comments so I can make a damn decision!
1:
2:
Then once I make a decision, and make a phone call like a grown up, I'll get it reupholstered and she'll look all shiny and new :)
Monday, January 26, 2015
Faking it.
In a couple of past posts, I've unofficially introduced you to my newest baby - the most covet-able house plant of the moment, at least in blog world - the infamous fiddle leaf fig. When I found her I did a little happy dance :) [in our small area it seems people haven't exactly caught on to the fact that this plant is VERY IMPORTANT and AMAZING, so you can't find them anywhere. Hence the happy dance when I found her, tucked among a sea of palms and rubber plants.]
I had an idea on how to make it better, from some past home updates at our old house. And all I needed was my favorite refinishing tool:
I set up shop in the spot I usually use for small refinishing projects - in perfect view of the TV. Because why not?
If you have some cheap, shiny brass stuff that you want classed up [you see that shit aalllll over Goodwill and Salvation Army thrift stores for pennies], set up shop in front of your TV and follow these steps:
1. Lay out on an old towel to catch all of the dust. If the object you're classing up is crazy dirty, you can wipe it down, but this had a normal amount of dust on it, so I didn't even bother cleaning it off first. Any shortcut that's available, I'll take.
2. Gentry scrub off the shiny bits with the steel wool. Look at it in the light so you can see where you're going and how much you're actually taking off. Work in a circular motion for best results. And if you have tiny nooks and crannies, just spread out the steel wool so it's more pliable, and shove it into the nooks.
2a. Be careful to not scrub off TOO much. I had a spot that started to look a bit shiny again. And it turns out I had just scrubbed off *all* of the brass plating in a spot. The shiny spot underneath is silver. Oops. So that part gets turned away from the dining room.
3. Wipe off the excess dust with a *very slightly* damp rag and THAT'S IT.
I put a cheap plastic plate in the bottom [so excess water won't ruin my beautiful new floors], dropped Miss Figgy in her new digs, et voila!
Looks quite nice, eh?
And just because this blog stands for truth, I took an updated photo too. The pic above was taken in November, and now - two months later - she still looks happy!
Don't be afraid of the cheap, ugly brass planters out there! It's crazy easy to fake it. All it takes is 10 minutes in front of the TV!
She fits right in :)
SO. Of course after finding such a gem, I of course took every measure to ensure her health, as they're sometimes known to be a bit ... finicky. I picked out a good spot [the spot I originally wanted for her would likely ensure her death, turns out. So I sucked it up and put her where she'd like living.] where she can get all of the bright, diffused light she likes. I cleaned off her leaves so she can absorb said light. I didn't transplant her from her original pot, as tips in some fig articles I read. I even named her, so she feels loved, and maybe, in turn, would decide to have more of a will to live.
She is now known as Miss Figgy.
One more thing I did for Miss Figgy to make her feel more at home was let her spread out a bit. When I bought her I just got a cheap plastic-lined basket to put her pot in, to make it less ugly. But it wasn't a great fit. It was a few inches too tall, so the last few rows of leaves were kind of jammed together. I didn't want to give Miss Figgy ANY reason to throw a fit and die, so I set about remedying that quickly.
Luckily, my mom had an old planter that was the perfect size, and brass, with which I am currently deeply in a love affair. One problem - it's the really cheap brass-plated tin kind. But it was FREE. Why not give it a shot? I had an idea on how to make it better, from some past home updates at our old house. And all I needed was my favorite refinishing tool:
I set up shop in the spot I usually use for small refinishing projects - in perfect view of the TV. Because why not?
If you have some cheap, shiny brass stuff that you want classed up [you see that shit aalllll over Goodwill and Salvation Army thrift stores for pennies], set up shop in front of your TV and follow these steps:
1. Lay out on an old towel to catch all of the dust. If the object you're classing up is crazy dirty, you can wipe it down, but this had a normal amount of dust on it, so I didn't even bother cleaning it off first. Any shortcut that's available, I'll take.
2. Gentry scrub off the shiny bits with the steel wool. Look at it in the light so you can see where you're going and how much you're actually taking off. Work in a circular motion for best results. And if you have tiny nooks and crannies, just spread out the steel wool so it's more pliable, and shove it into the nooks.
2a. Be careful to not scrub off TOO much. I had a spot that started to look a bit shiny again. And it turns out I had just scrubbed off *all* of the brass plating in a spot. The shiny spot underneath is silver. Oops. So that part gets turned away from the dining room.
3. Wipe off the excess dust with a *very slightly* damp rag and THAT'S IT.
I put a cheap plastic plate in the bottom [so excess water won't ruin my beautiful new floors], dropped Miss Figgy in her new digs, et voila!
And just because this blog stands for truth, I took an updated photo too. The pic above was taken in November, and now - two months later - she still looks happy!
Don't be afraid of the cheap, ugly brass planters out there! It's crazy easy to fake it. All it takes is 10 minutes in front of the TV!
Subscribe to:
Posts (Atom)